Showing posts with label pendant. Show all posts

Monday, 7 January 2013

Using tutorials/books week 1

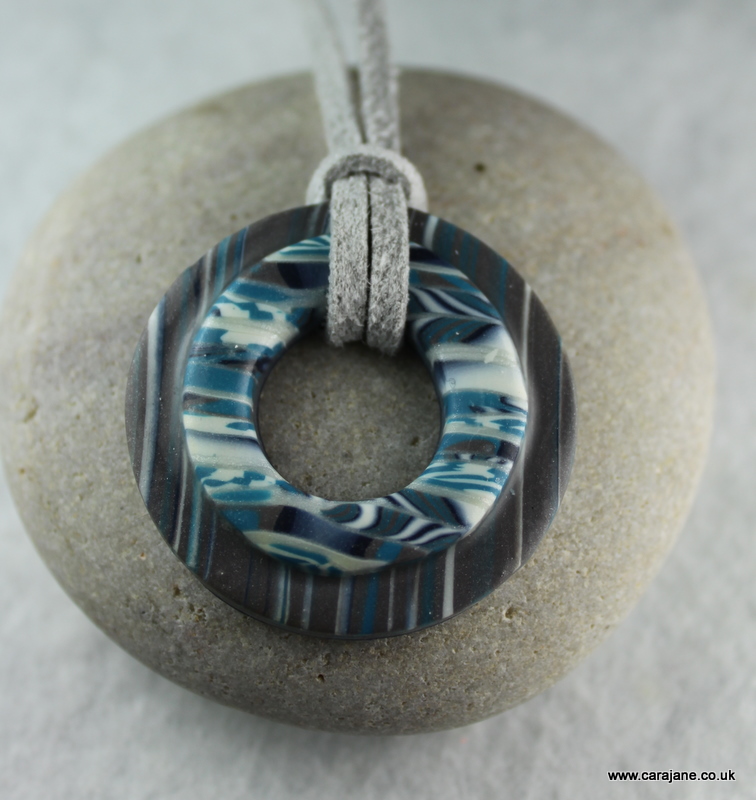
I randomly picked a publication from my bookshelf to try out something new (my new year challenge - to use the wonderful resources sat under my nose!) and picked the magazine From Polymer to Art - Orange. A quick flick through and I chose to try out a project by Fabi. Her pendant in the magazine was orange and green - not really my colours so I changed the colours to some more 'me' ones from some left over clay I had from other projects.


I understand it's difficult explaining projects fully for magazines as there are limited steps and limited text. I struggled at a few points to understand but luckily the pictures are good and helped me through to the finished pendant. It didn't take too long and there's a lot of different bits to the project, many of which I had done before but it still taught me a couple of new tricks.

However my first attempt didn't work out quite so well due to me trying to rush. A common theme in my life - trying to squeeze too much in and not giving it the time it needs. I am trying to slow down and take more care but  I forgot all about that. I decided in my wisdom that I could put the back on at the same time instead of baking the front and then applying the bail to the cured front piece to save time. But I made a couple of critical errors - I rushed putting the back on and tried to bake it on the baking paper I was using to smooth the surface. When the pendant went to the oven there was air trapped under the back layer (because I had rushed and just placed it down rather than laying it down carefully), which bubbled and ballooned. If the pendant was on a tile the front surface would probably have stuck to the tile and just the back would be deformed but because it was on the light weight paper the front was able to lift up and deform too. The result - the front of the pendant instead of remaining nice and smooth and flat and needing minimal sanding looked corrugated! I decided I could solve this with sanding as the layers were quite thick I'd just sand it flat. There was a lot of sanding to do and I had run out of my normal 'I need some serious sanding' 320 grit sandpaper so used 240 grit sandpaper instead. Another error - it was so rough it made deep scratches in my pendant which I haven't quite managed to sand out as I then realised that although the layers were quite thick the stripes on the edge pieces were only on the surface so that pattern was ruined - so I gave up. I am left with an unsatisfactory piece due to my haste!

Made in too much haste - see ruined stripe pattern on the right hand edge - the scratches don't show too badly here but they look terrible in real life.

I still had some patterned pieces left so I made another pendant - baked the front piece and then took my time to add the back and bail to the cured pendant with care.


I'm pleased with the result and will try out some more like this sometime soon I am sure. The brighter colour and better contrast made Fabi's pendant look good - I will try and be bolder next time. Thanks Fabi! It was great to play with clay again after a couple of weeks of family time!

I hope your 2013 has got off to a great start! I'm off to browse my bookshelf for this weeks project...


Thursday, 22 November 2012

Bright Flowers - a new set

The weather here in the UK is horrible today so I have tried to cheer things up with these bright flowers


These are slightly different from my normal flat flower pendants as they are slightly curved and each petal slightly cupped. They also have a dimension centre which looks like little tubes but is actually just little sticks of clay (adhered with the wonderful Kato polypaste) that I poke a pin into to give the illusion of being hollow. I think the curve looks elegant and adds interest.

The will be for sale this Saturday at:

FishFest's Fabulously Festive Fair, 4-9.30pm,  All Saints Church Hall, Grove Rd Fishponds: arts, crafts, live music, beauty treats, freshly made nibbles and childrens' activities. Buy unique gifts, support local craftspeople and next years' Community Festival!

Will anyone buy them, if so I wonder who? I hope the weather isn't too horrible where you are.

Thursday, 2 August 2012

Green Mokume Gane Set

I made this set of jewellery in Mokume Gane from several custom mixed green shades of Kato clay for a friend's birthday. I was delighted with the result and was dying to show you but couldn't post them just in case!! She's had them now so I can show you too. Couldn't resist a little owl with the mokume gane shavings! As you can see I am making good use of what I learnt from Melanie Muir in her workshops.


Thursday, 31 May 2012

Melanie Muir's Rock Cuff class - the results!

I recently stayed up half the night to watch a CraftCast Webinar with the Marvelous Melanie Muir - it's an online workshop and it was fabulous and the best thing is I have a download of the workshop so I can go back and watch it again when I can't quite remember. You can purchase a download yourself here - www.craftcast.com.


It has taken me a while as I seem to be too busy to fit much polymer clay time in at the moment :( Am trying to rectify that as soon as I can as I am  happier when playing with my clay!! But finally it is finished! Here's my first rock cuff

 
I made an extra 'Rock' so I also have a matching pendant - it's very shiny so hard to get a great photo. Will try again another time when I am less rushed!

When I took the workshop in March with Melanie Muir and she taught us how to make what she calls a 'Simple Cuff'; it was a brilliant class and I felt like we had been given so much really useful information I couldn't remember it all. I also was really admiring Melanie's bracelets she had for sale so when she mentioned she was doing the CraftCast class I knew it would be good and as I hoped I now have a video record of all that information so I can really digest it! You can see Melanie's beautiful collection of Rocks Cuffs on her website.  As you can tell I am a big fan, she's a lovely person, a talented and generous teacher and her work is to die for - amazingly beautiful and perfectly finished!

Sunday, 1 April 2012

Rainbow Artichokes

As you have probably read I was lucky enough to take a workshop with Eva Ehmeier recently and learnt how to make her fabulous artichoke pendants.  For my earrings for this week, week 12 for me,  in the 52 pairs of earrings a year challenge I decided to have a go at making rainbow artichoke earrings.

Rainbow Artichoke Earrings Week 12/52

Off course I had to make a pendant to match!

Rainbow Artichoke pendant bottom view

Rainbow Artichoke pendant side view
They take quite a while to make, there are over 60 'leaves' in the pendant, choosing to make the 'leaves' in 8 colours was quite ambitious!

We have been having some lovely sunny weather recently which has been glorious, I hope you have had some too!

Tuesday, 13 March 2012

Black kaleidoscope set


Here's my latest kaleidoscope set. I am really enjoying playing with kaleidoscope canes at the moment!

Not long now til Polymer Pamper Play - I can't wait! Looking forward to showing you the new things I will have learnt when I get back.

Tuesday, 21 February 2012

More things....

Here's some more of the things I've made for my thing a day challenge. I am really enjoying the challenge and so far have made something everyday without having to cheat. Sometimes it's a cane, sometimes it's finishing something already started and some days it's a something from start to finish.


TAD 15 Kali beads and pearls - close up


If you want to see all of my Things for February so far, and another one added daily (I hope!) you can find them in this Flickr set

Monday, 6 February 2012

Electric Zebra Flower

For my thing a day challenge I was experimenting with canes. I came up with this and I rather like it! I think it's quite striking. Normally if I am experimenting I photograph the stages so I can recreate it if it works out. I didn't this time but I think I can remember so I am off to try and recreate it!


I put this picture together so you could see the back and the front which are subtly different. The little petal dangle is on the end of an extension chain which not only allows for some variation in length of pendant but helps to keep the clasp at the back. Not sure I like all the words, is it too fussy?  

This was my thing a day for day 5 of February. You can see all the other things I have made each day in this flickr set. It has been quite hard to keep up as I have been ill, luckily some things were quite quick and some things were started and just needed finishing. I am enjoying the challenge and like that it makes me finish things, it saves things from going into those dreaded boxes of part made things - the to be sanded box, the holes needing drilled box, the I don't know what to do with this box!

Sunday, 22 January 2012

Oohh shiney!

I called in to visit Penny Vingoe who runs www.clayaround.com just before Christmas and we had a play with some Lisa Pavelka Magic Glos resin. I really liked it so bought a bottle. It's a UV cure resin and luckily I had a suitable light at home already, we don't get enough sun in winter here in the UK!!

I tried it for the first time earlier in the week on a flat polymer pendant but it was pulling away from the edges a lot, which doesn't look good. Penny and I had been using it on a bracelet made up of metal bezels linked together so this wasn't a problem as the resin clings to the edge and doesn't pull away as it cures. So I tried a quick pendant with a polymer frame to see how it worked out. This was made with a few scraps rather quickly as I am busy at the moment. The frame needs to be neater and a little higher but it's definitely got possibilities. I made the back and outside edge textured which contrasts nicely with the smooth shiny resin - oh and means no sanding at all!! I think you might see more resin coatings! It also means I can play about with different surface techniques.

Pendant before resin, the black frame around the edge stands proud a little.

Here it is coated in resin!

 If you haven't come to say hello on facebook yet please do - http://www.facebook.com/CaraJaneContemporaryJewellery

Friday, 25 November 2011

Some more new jewellery

I have been very busy making things this week. Here's a couple of my newest pendants. I am trying to always add a little extension chain and dangle, it means the length of the necklace is adjustable to some degree and the clasp is more likely to stay at the back.  I wrote a blog post a while ago about keeping necklaces in place - you can find it here


Monday, 10 October 2011

My Blue, Teal and Grey Stroppel Cane

I used the scraps from my last projects to make a Stroppel Cane, looks quite different using a limited palette.

Here's some of the things I have made with it.

Domed disc Stoppel Cane pendant


Little disc earrings

Longer pendant, think on reflection the stripes look better vertically, next time...

Domed doughnut pendant. The dangle is the bit cut from the center.

Playing about with the scaps, not quite sure about this but my husband likes it.

Me wearing the disc pendant, it has a little too much white to really go with this top but it's not bad.


I have collected together everyone's images of their Stroppel Cane things on a pinterest pinboard here.

Wednesday, 21 September 2011

Black and white stripes

Last night whilst I was lying in bed I saw this pendant. So today I made it.

It's to go with this stripy top I wear all the time! 
I am thinking perhaps it should of been bigger, maybe I will make another one later.
Hope you are having a good week.
Cara

PS Please come like my page on facebook. You can click on the button up there on the left

Friday, 18 March 2011

Latest jewellery - and it's all for me!

I haven't had any new jewellery for myself for a while now, I was busy making sale stock and completing orders. So far this year things have been quieter so finally made myself some new things. Here's some of them

3 blue and white skinny bangles. I am road testing these to see how they strong they are. Baked them extra long to try and make sure they were strong!

Blue and white oval cabochon pendant, I do love this simple blue and white flower cane. This is the second batch of the cane I've made and I can see I will be making more.

The blue and white colours are also the colour palette for this week in the Flickr Colour Palette a Week group - do come and join in with whatever medium you craft in.

Hollow beads made using the technique I learnt on Christine Dumont's Hollow Bead Workshop. She is just about to start an online workshop for these beads so follow the link and check it out.

Hollow beads strung as a necklace


I've more to show you tomorrow. Hope you all have a great weekend
Cara


Friday, 11 February 2011

Colour Palette Challenge

I thought about taking part in a Thing a Day challenge this year but decided I would only get behind and frustrated when life got in the way. The last couple of weeks I've had plenty of creative time but January I didn't really touch my clay at all :(


I did however happen across a Flickr group (I watch Flickr instead of TV these days, much more inspiring) called Color Palette a Week . Every week Chris who started the group posts a palette of colours and the idea is that people create something using that palette then share it with the group. I tend to stick with similar colours and I have been thinking for a while that perhaps I should 'design' my pieces of jewellery using a palette of colours rather than just picking up what I feel like so this seemed like a good challenge. I was slow to get started but finally posted my first item to the group (2 weeks late but... I started it in the right week).


My creation

The colour palette for week 4 - based on the Mystery  Machine (the van from Scooby Do)


I made a Skinner blend from all four colours in the palette but the pendant would of been giant to fit them all in so I lost most of the turquoises, should of thought about what I was doing before I started but I just mixed up the colours and decide to blend them. As it is it's 7cm across! 

The Art of Jewelry: Polymer Clay: Techniques, Projects, Inspiration

made it using the instructions by Mari O'Dell for an Art nouveau pendant in the book 'The Art of Jewellery - Polymer Clay by Katherine Duncan Aimone.


I used black acrylic paint mixed with liquid clay for the black pattern and it blistered in the oven which is why the black pattern looks a little odd. Pattern is a Lisa Pavelka texture stamp.

I am working on this weeks palette, I have made several things just need to get them sanded and strung. I seem to be a bit manic at the moment with the blog but I have had some clear creative time so am making the most of it. I was claying in the middle of the night last night as I am having trouble with a tooth and couldn't sleep. I'll share some pictures later.

Sunday, 6 February 2011

Latest pendant

I am getting ready for my next sale on Friday evening, in Fishponds. It's part of a foot pampering night organised by a friend of mine.

I will have some new jewellery to display including this pendant
New domed pendant on wire choker front

The back of the pendant

As you can see it has my new signature cane on, jewellery made from 1/2/11 will have it incorporated.

Friday, 4 February 2011

Choker necklaces and new pendants

Suddenly everywhere I look there are choker necklaces - and they look fab!  I wanted to make some but wasn't sure where to get them in the UK (did have a look on the bead supply websites but didn't find them).

At the London Polymer Clay Group meeting on Sunday, Rebecca Thickbroom  (who is one of the organisers of the Polymer, Pamper, Play event I am very much looking forward to!) showed some beautiful choker necklaces


Rebecca's beautiful choker pendants!


They were inspired by the amazing work of Helen Briel and made using one of her texture stamps

Even the back of Rebecca's pendants are beautiful!

Rebecca was able to tell me where she bought her wire chokers  in the UK and I ordered some.

So I was playing with my rainbow stripe jellyroll cane and planning on making a cabochon pendant with it. I decided to make a round one and use a large cane slice in the middle. I carefully firmed the first slice right in the middle and then looked at it and couldn't see how I could tidily cover the rest without any big black gaps or over lapping the middle slice, which I didn't want to do. And as happens with all the best pieces it just made itself.


 I loved the basic concept but was concerned with how I was going to sand it, I only wanted to sand the cane slice and I had smoothed it flush with the black. Also it was bulky - then I had a light bulb moment ;)

This is the first time I have used a light bulb to cure polymer clay in a dome shape, luckily I had put the last one that blew in my clay supplies for just such a moment (as you can see I was getting carried away with my rainbow jellyroll and signature canes)
So here is the end result of the lightweight pendant which drew inspiration from Rebecca's pendants above. I used a very similar textured back which is beautiful, professional looking and best of all doesn't need sanding - genius! Another opportunity to use my signature cane. I just love this, especially strung on the choker wire (so much easier than making up a cord like I normally do!).


I have a small sale in my local church hall (as part of a friends foot pampering night) next week and I shall be making some more along these lines to see if other people like them as much as me!

Phew! Think I am done for now. Thanks for sticking with it.
Cara x

(still not perfect but better photos at least)