Thursday, 21 March 2013

Synergy 3 - Wonderful!

I am just back from Atlanta where I have been attending the IPCA conference - Synergy 3. It was wonderful!!!

The seminars were excellent. I have many new ideas to take on board. My head is still rather muddled from the travel and tiredness (didn't sleep a lot whilst I was away for many reasons - excitement, noise, different time zones, parties....) but I shall sit down and read through my notes again in the next few days. My work was already heading in a slightly different direction through the course I was taking on Voila and the photography course I took with Brit Hammer but now the path is clearer.

It was amazing to be surrounded by so many talented and truly lovely people. Everyone was so welcoming and friendly - even my polymer hero's. I have made some truly great friends and I just wish I had more time and money so I could go visit them all soon! I know I will see lots of them again but it might just take a while. Thank goodness for technology for allowing us to keep in touch even when we are on the other side of the world!!It was so nice to connect in real life with people I considered friends online. The best thing is they were all even nicer in real life!! What a lot of fun we had!

Marjon, Amanda, Me and Saskia at the gala dinner

I don't want to overload you with photos (and I don't want to share loads of other people without their permission - sure the above ladies won't mind being featured here)- you can see more on my Synergy 3 facebook album . While I'm mentioning facebook - if you don't already like my facebook page please do so - another 70 likes to get me to 1000 likers which is incredible! I'll do another giveaway when I get to 1000 as a thank you to you all for taking the time to like my page.

The gallery of work for sale was an amazing source of inspiration. So great to see the work I have admired in photos online up close. Wow there are some amazing artists out there! I had a small selection of things in the gallery - thank you to those of you who purchased things it made my day to know that polymer people appreciate my work too! It was great to see all the jewellery people were wearing too.

I was lucky enough to take some pre and post conference workshops with Angela Garrod, Maggie Maggio and Dan Cormier. They were all very different and I learnt different things in all of them. They are also all lovely people. I will try and finish off the things I made to share with you soon.

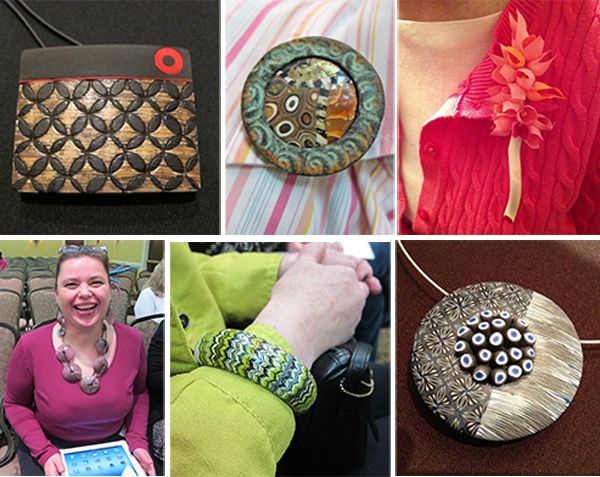
Thank you to Cynthia Tinapple for sharing one of my pendants (the one I wore on the first day) on Polymer Clay Daily - it was an honour to be featured! It made my transition back to the real world a little easier ;) Here's the image (my pendant being in the bottom right corner) and you can read the post here - http://polymerclaydaily.com/2013/03/18/treasure-chests/

I am really looking forward to the next polymer clay get together - it's so nice to connect with real people who share your passion!

Thursday, 21 February 2013

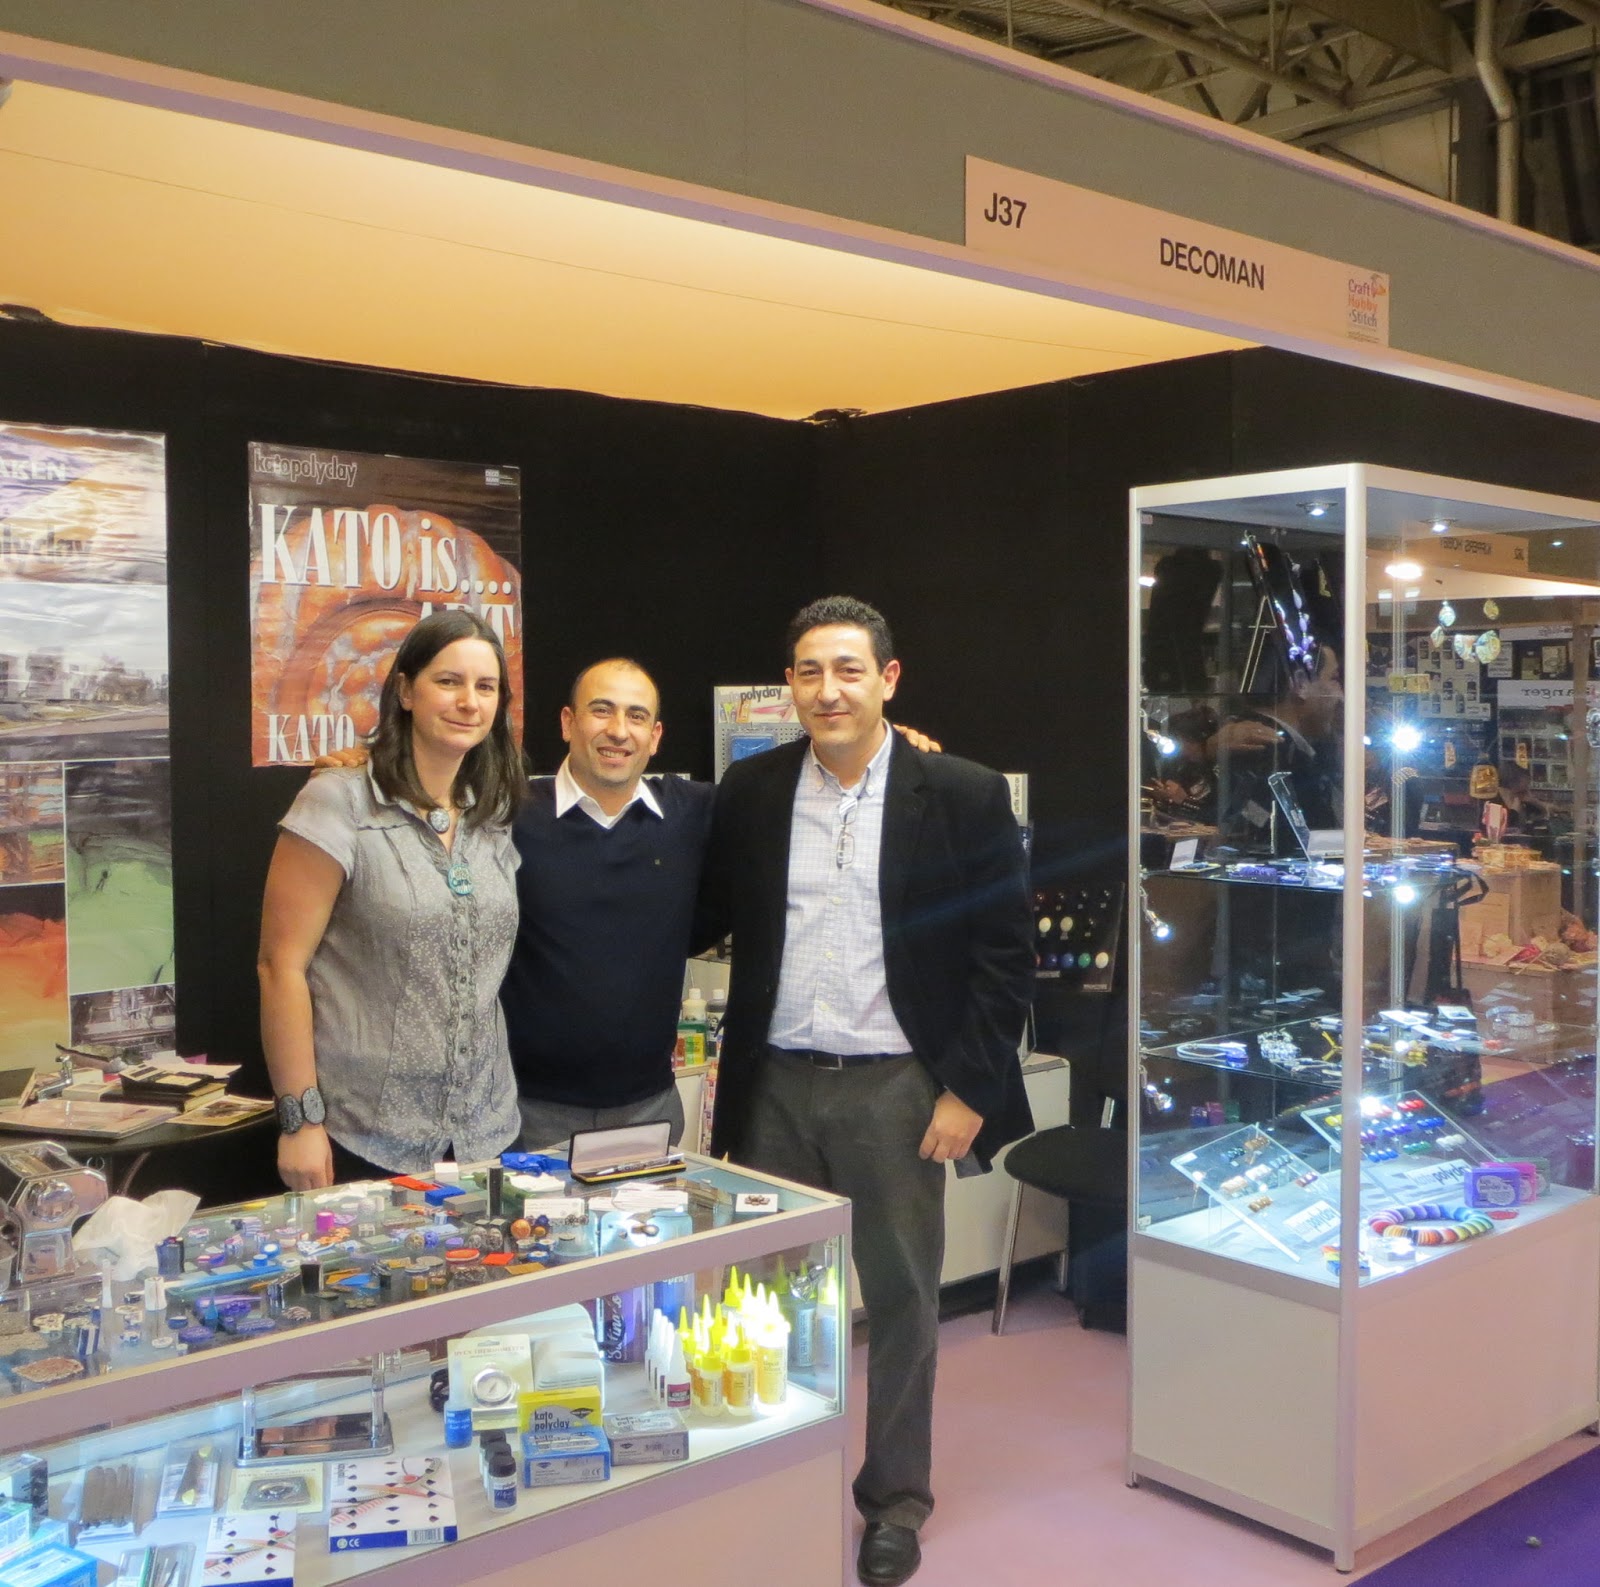
Demonstrating at the NEC

As you are probably aware I am a huge fan of Kato polyclay so I was over the moon when I was asked if I could demonstrate with it at the Craft, Hobby and Stitch International trade show at the NEC last weekend. I spent 2 whole days showing people the magic that is polymer clay - I can't think of anything better to do (well apart from spending 2 days being shown how to do new things with polymer clay!). I was amazed at how many people in the craft industry hadn't even heard of polymer clay before!

Here I am in the Decoman booth - in a quiet moment when you could see past crowds of interested people! Decoman are the European distributors for Kato polyclay.


I made a lot of different things - mainly cane work and mokume gane as they are fairly simple to show and impressive to see. Here's some of what I made.


There was plenty of beautiful jewellery on show in the big glass cabinet, some of it mine and some from other artists such as Donna Kato - it caught a lot of people's eyes as they were walking past! It was a real pleasure to be a part of the Decoman team!


Since I've been back I have been busy working on something I can't show you yet - so I have been making things for my thing a day challenge but I can't share them.

Tomorrow I am off to demonstrate at Hobbycraft in Cribbs Causeway Bristol from 10am -1pm. I am also teaching a workshop there next week on Friday 1st March 10am-12.30pm. I still have 2 places left if anyone is interested please get in touch

Friday, 15 February 2013

Blue Thing a Days - Delft inspired cane

It's all been a bit rushed this week but I have managed to make some canes for my Thing a Day Challenge. I chose blue as a theme as the lovely Sarah of Beadscrumptious was challenging herself to create something blue this week too.

Here's the canes I've made over the last few days - inspired by my recent trip to Delft!
Day 1 I made a fairly simple flower cane with a crinkly centre
 Day 2 I made what I call a flourish - the bits you get at the corners or the sides of the main delft pattern - or on the corner of tiles

Day 3 I put them together. It wasn't my original plan to put them together like, I was originally going to make a square cane with flourish corners but... this just happened.  They seemed to fit so well


I carried on and put them together a bit like a flower cane. I like the way it's turned into a flower within a flower, with a flower on each of the large flower petals. Now I just need to decide what to make with it!

I'm going to have plenty of making time over the next few days, I am hosting a kids polymer clay party for one of my daughters friends (much to my daughters delight as she will of course be the expert and my helper!) and then I am going to be demonstrating polymer clay for a couple of days at a trade fair - I'll tell you all about that when I get back!

Tuesday, 5 February 2013

Polymer Clay turtle for my challenges...

For my Thing a Day challenge and also my personal challenge to actually use my books and tutorials I made a turtle today.

Father Christmas brought me the Christi Friesen 'Under the Sea' book this year so I decided to try a turtle. I like the way Christi does these 'beyond projects' books: there's a whole heap of ideas to help you customise your own creations. I'm tired today so didn't want to get too adventurous so mainly followed the turtle that Christi made in the book. I didn't happen to have any lovely lampwork beads around like Christi uses to make her lovely turtle so I found some scraps of brown clay and marbled them a bit to make an interesting little focal. My plan is to add some resin to that when the turtle is cured so I made the framing swirls a little proud to help keep the resin in place - I'll let you know how that works out!

Anyway here's the little turtle (well I say little he's a lot larger than my normal tortoises which are 2 or 3cm long), he's about 8cm long.

Small green and beige polymer clay turtle made by Cara Jane

There's a lot of things I would do differently if I made him again, that's the thing with doing projects like this - different from your normal things, you learn new things! I should of cut my nails first - there's a few nail marks I didn't really want but those are of course part of what makes it handmade and unique! I didn't like the mouth when I first made it. It just didn't seem right and it had gone too close to the eyes. For some reason I decided to poke the end of a knitting needle into the slit I had made and hollowed round to make a mouth cavity - it changed the whole look of the face which I much preferred. Colours aren't really my colours but they are quite turtle I guess.

I had fun playing with my clay and I enjoyed Christi's humour which she has infused throughout her book. If you are at all interested in sculpting with polymer clay and you like Christ's unique style of polymer clay work you will love her books. They are packed full of inspiration pictures, tips and techniques, subtle variations, things to get you started. You can use it as a step by step book or just as a starting point with some tips to guide you - I like that and I think it works well.

If you want to keep up with all my Thing a Day's for February I suggest you check out my flickr set as that seems to be the only place I have put them all so far.

I'll be demonstrating in Hobbycraft Bristol tomorrow between 12-3pm so I am sure I will have plenty of things made tomorrow! I'll update you with my things in a couple of days.

Have fun !!

Cara


Friday, 1 February 2013

Latest workshop dates and Thing a Day starts!

I have several introduction to polymer clay workshops in Bristol throughout Feb- April. You will find details on my diary page and also in my facebook page events. There will also be a few intermediate level workshops - if you are interested in those please get in touch!  I also have couple of instore demonstrations at Hobbycraft Bristol, there you can see me make some polymer clay canes and I will have a small selection of my work available to buy. It's a great chance to come and ask me any questions you have about polymer clay work too! If you want to keep up to date with what I'm doing and you haven't already you can sign up to my mailing list here. I promise I won't burden you with hundreds of emails - just one every couple of months or so and you can easily unsubscribe anytime you want.

Today being the first of February marks the start of the Thing a Day challenge on Polymer Clay Central Forum (an excellent place for polymer clay support!). I really enjoyed this last year - you can see all my makes here in this flickr set or on my pinterest board. I shall share my makes this year with you of course - perhaps not every day as I will be busy making ;) It's likely they will be posted on my facebook page more frequently - hopefully every day. It'll be interesting to compare them with what I made last year.

Here's my thing(s) for today! Love creatures - with valentine's day coming up! They are heading off to the lovely Tenderfoot gift shop in Bristol and are hoping that someone lovely will brighten someone's day by giving them as a gift ;)
polymer clay owls decorated with hearts
Lovely Owls


Polymer Clay Pigs decorated with hearts made by Cara Jane
Lovely Pigs
Lovely polymer clay heart decorated creatures by Cara Jane
Lots of lovely creatures - each one is different of course!


I haven't done much clay work this month as I have been busy learning to take amazing photos of my work with Brit Hammer. It's been hard work but an extremely valuable experience - I have learnt so  much! Hopefully you will notice a difference (perhaps not with these quickly grabbed shots)!

Sunday, 20 January 2013

Using tutorials/books week 2 - Donna Kato

One of my favourite polymer clay books is Dona Kato's - The Art of Polymer Clay Millefiori Techniques. I have always admired the Translucent Overlay Beads featured in the book, as has my friend Hannah so this week we decided to try them out together.

We both made a couple of canes from the selection Donna suggests and put them together. The instructions are pretty clear and as all the canes themselves are reasonably simple we had no trouble making the canes. We made coloured translucent clay by adding Kato concentrates to translucent Kato clay, this is the red and blue clay shown in the canes below. Here's our cane collection.


We both made a large bead/pendant out of scrap clay which we covered with a layer of white clay - so that we didn't get murky mud colours showing through any translucent parts. Here's Hannah's in progress. Again Donna gives instructions of how to construct the beads which are relatively straight forward.


The layers need to be really thin, the Kato translucent clay was pretty soft so we put the canes in the fridge for a while but they were still pretty hard to 'shave' thin layers from without terrible distortion. Leaching the soft clay at the start probably would of been helpful. I would also recommend practising shaving thin layers on a block of scrap clay before using your canes if you haven't done it before. I need more practise still I think!

The photos above are in progress snapshots captured with my little point and shoot camera whilst we worked. I am currently taking part in an excellent guided online photography course with Brit Hammer - Photographing Fine Art and Craft . so I took a little more time to photograph my end result. Here's a couple of shots - I'd be interested to know which you prefer if you have the time to leave a comment. The course is keeping me busy but hopefully I will have plenty of beautiful photos to share with you soon. I would highly recommend it as Brit really takes time to find out what it is you want from your photos and helps you to achieve it. I am having great fun and learning loads!


I wish I had taken more care in placing  my overlapping translucent skinner blend striped layers.  I don't like the way they meet in places. The ripple cut mokume cane (the red and slightly zig zaggy gold bits) is a subtle effect when done with a fine ripple blade. My favourite part is the jelly roll mokume gane which is the gold and translucent spiral cane. It looks like gold fingerprints to me! You can't sand it much as the layers on the surface are so thin. I just gave this a light sand/polish with some micromesh cloths. 

I made my bead quite large as I wanted it to be bold and striking. Well it's certainly bold! Perhaps a little on the large side so I shall make smaller ones next time!

 I am pleased with my end result although it's not quite as I had in mind when I started out. Of course I much prefer Donna Kato's beads so at some point I shall revisit this and try out different colours and different placement of the component canes. 

I hope you are having fun in 2013 so far!

Cara


Monday, 7 January 2013

Using tutorials/books week 1

I randomly picked a publication from my bookshelf to try out something new (my new year challenge - to use the wonderful resources sat under my nose!) and picked the magazine From Polymer to Art - Orange. A quick flick through and I chose to try out a project by Fabi. Her pendant in the magazine was orange and green - not really my colours so I changed the colours to some more 'me' ones from some left over clay I had from other projects.


I understand it's difficult explaining projects fully for magazines as there are limited steps and limited text. I struggled at a few points to understand but luckily the pictures are good and helped me through to the finished pendant. It didn't take too long and there's a lot of different bits to the project, many of which I had done before but it still taught me a couple of new tricks.

However my first attempt didn't work out quite so well due to me trying to rush. A common theme in my life - trying to squeeze too much in and not giving it the time it needs. I am trying to slow down and take more care but  I forgot all about that. I decided in my wisdom that I could put the back on at the same time instead of baking the front and then applying the bail to the cured front piece to save time. But I made a couple of critical errors - I rushed putting the back on and tried to bake it on the baking paper I was using to smooth the surface. When the pendant went to the oven there was air trapped under the back layer (because I had rushed and just placed it down rather than laying it down carefully), which bubbled and ballooned. If the pendant was on a tile the front surface would probably have stuck to the tile and just the back would be deformed but because it was on the light weight paper the front was able to lift up and deform too. The result - the front of the pendant instead of remaining nice and smooth and flat and needing minimal sanding looked corrugated! I decided I could solve this with sanding as the layers were quite thick I'd just sand it flat. There was a lot of sanding to do and I had run out of my normal 'I need some serious sanding' 320 grit sandpaper so used 240 grit sandpaper instead. Another error - it was so rough it made deep scratches in my pendant which I haven't quite managed to sand out as I then realised that although the layers were quite thick the stripes on the edge pieces were only on the surface so that pattern was ruined - so I gave up. I am left with an unsatisfactory piece due to my haste!

Made in too much haste - see ruined stripe pattern on the right hand edge - the scratches don't show too badly here but they look terrible in real life.

I still had some patterned pieces left so I made another pendant - baked the front piece and then took my time to add the back and bail to the cured pendant with care.


I'm pleased with the result and will try out some more like this sometime soon I am sure. The brighter colour and better contrast made Fabi's pendant look good - I will try and be bolder next time. Thanks Fabi! It was great to play with clay again after a couple of weeks of family time!

I hope your 2013 has got off to a great start! I'm off to browse my bookshelf for this weeks project...