Showing posts with label rainbow. Show all posts

Sunday, 1 April 2012

Rainbow Artichokes

As you have probably read I was lucky enough to take a workshop with Eva Ehmeier recently and learnt how to make her fabulous artichoke pendants.  For my earrings for this week, week 12 for me,  in the 52 pairs of earrings a year challenge I decided to have a go at making rainbow artichoke earrings.

Rainbow Artichoke Earrings Week 12/52

Off course I had to make a pendant to match!

Rainbow Artichoke pendant bottom view

Rainbow Artichoke pendant side view
They take quite a while to make, there are over 60 'leaves' in the pendant, choosing to make the 'leaves' in 8 colours was quite ambitious!

We have been having some lovely sunny weather recently which has been glorious, I hope you have had some too!

Tuesday, 21 February 2012

More things....

Here's some more of the things I've made for my thing a day challenge. I am really enjoying the challenge and so far have made something everyday without having to cheat. Sometimes it's a cane, sometimes it's finishing something already started and some days it's a something from start to finish.


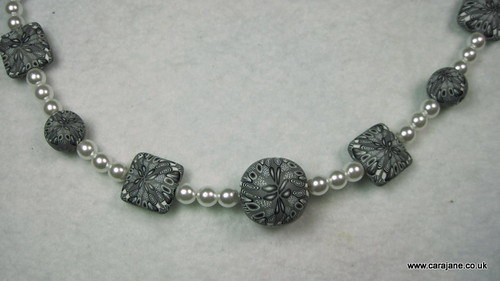
TAD 15 Kali beads and pearls - close up


If you want to see all of my Things for February so far, and another one added daily (I hope!) you can find them in this Flickr set

Tuesday, 22 March 2011

My almost entirely polymer braclet

I used the spare toggle set to make another new bracelet for me! There are some glass spacer beads, some tiger tail wire to hold it together and 2 crimp beads to fasten the tiger tail but the rest is polymer!


The discs are curved, partly to match the curve of the pendant with the same design and partly so that it fits the wrist better. I chose a cookie cutter that fitted over my hand and baked the discs on it. I then lay a sheet of clay on the back, cutting out 2 channels for the tiger tail wire and another sheet of black which I textured over that to enclose the channels.

It is very comfortable to wear, it's light and fits nicely, not too tight, not too loose. I think I shall be making some more like this!!

Sunday, 6 February 2011

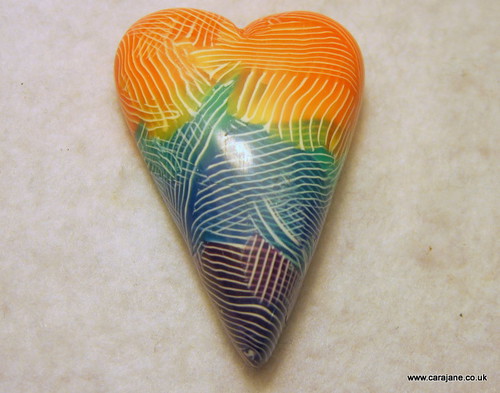
Birthday heart

We went out last night to celebrate one of my friends birthdays to an 80's club. I wanted to make her a funky piece of retro jewellery, which was why I started the whole rainbow thing but I couldn't show you this before in case she happened to read my blog.

So I have been meaning to try making hollow lentil beads but for some reason decided I was going to make a hollow heart. Probably not the most sensible idea as I have never tried the technique with the much more simple lentil shape but I like a challenge!

So I sculpted a heart shape from scrap clay to use as a mould.I then made some shells of scrap clay on the mould and joined them together incorporating a wire hanging loop - this is a hollow heart, curved on both sides

I made a sheet of patterned clay by cutting fairly thin slices from my funky rainbow striped jellyroll cane and laying them on a thin sheet of clay, you can just about see where I marked out roughly the size/shape I would need to cover the heart so I didn't waste to much cane.


I used another patterned sheet on the other side so it would be reversible. This photo was taken before I had smoothed the edge joins.


Here's the finished necklace! 


I was going to put it on a long black cord but just tried it on a choker and thought it looked cool so left it. It is rather large! It's 7cm wide by 8cm long! Being hollow it's not too heavy and when I tried it out found it comfortable to wear. I made the mould the size I wanted the heart but then made the shell from a thick sheet of clay and then covered it so it ended up a lot bigger (mental note to self remember a mould needs to be smaller next time!).

Happy Birthday Aly!

Friday, 4 February 2011

Choker necklaces and new pendants

Suddenly everywhere I look there are choker necklaces - and they look fab!  I wanted to make some but wasn't sure where to get them in the UK (did have a look on the bead supply websites but didn't find them).

At the London Polymer Clay Group meeting on Sunday, Rebecca Thickbroom  (who is one of the organisers of the Polymer, Pamper, Play event I am very much looking forward to!) showed some beautiful choker necklaces


Rebecca's beautiful choker pendants!


They were inspired by the amazing work of Helen Briel and made using one of her texture stamps

Even the back of Rebecca's pendants are beautiful!

Rebecca was able to tell me where she bought her wire chokers  in the UK and I ordered some.

So I was playing with my rainbow stripe jellyroll cane and planning on making a cabochon pendant with it. I decided to make a round one and use a large cane slice in the middle. I carefully firmed the first slice right in the middle and then looked at it and couldn't see how I could tidily cover the rest without any big black gaps or over lapping the middle slice, which I didn't want to do. And as happens with all the best pieces it just made itself.


 I loved the basic concept but was concerned with how I was going to sand it, I only wanted to sand the cane slice and I had smoothed it flush with the black. Also it was bulky - then I had a light bulb moment ;)

This is the first time I have used a light bulb to cure polymer clay in a dome shape, luckily I had put the last one that blew in my clay supplies for just such a moment (as you can see I was getting carried away with my rainbow jellyroll and signature canes)
So here is the end result of the lightweight pendant which drew inspiration from Rebecca's pendants above. I used a very similar textured back which is beautiful, professional looking and best of all doesn't need sanding - genius! Another opportunity to use my signature cane. I just love this, especially strung on the choker wire (so much easier than making up a cord like I normally do!).


I have a small sale in my local church hall (as part of a friends foot pampering night) next week and I shall be making some more along these lines to see if other people like them as much as me!

Phew! Think I am done for now. Thanks for sticking with it.
Cara x

(still not perfect but better photos at least)

Thursday, 3 February 2011

Rainbow owl

Here's the first thing I have finished (because I don't sand them) with my funky rainbow jellyroll. This little owl has glow in the dark (fimo) eyes and a lovely rainbow tummy and one slightly long wonky ear - it's character of course! I think I might try and photograph my work and checking it before baking, it's amazing what you spot in a photograph that you don't always see in real life. Didn't notice his ear until now.

and have a quick look at his bottom, I am using my signature cane and I like it. I think I will be remaking an improved one with clearer flower sometime soon. 


I shall post some of my jewellery when I have sanded and strung it, hopefully in the next couple of days. I am going to move sorting out my photography set up nearer the top of my to do list so I can show you my work more clearly.

Thanks for stopping by
Cara

Wednesday, 17 March 2010

Glow in the Dark Rainbow Jellyroll cane

This is a neat cane which I learnt from one of Cindy Leitz's video newsletters  (I love Friday's the day they arrive!). There is a lot of excitement about this Friday's video as it is Faux Opals that look great!

I had to switch back to Fimo as I had Fimo Soft Glow in the Dark and Kato don't make one (might be worth an email suggesting that they do of course). I find the fimo so soft to work with now I don't really enjoy it.

I did for the first time ever put a cane in the freezer for 15 mins before slicing - worked a treat. The cane was nice and firm to work with after that - until it warmed up. Will have to try some of Cindy's cane slicing tips! I do need some help with slicing canes better so if anyone has some tips leave a comment or mail me! I shall make it a mission to experiment and perfect slicing canes.

Glow in the dark rainbow jelly roll cane!


So first things first I made the obligatory cane end tortoises (one from each end of the cane)


I gave these little guys glow in the dark eyes too ;)


I then made a couple of simple cane slice beads and a couple of lentil swirl beads, not sure I swirled them enough now - oh well next batch!

Well these beads have popped into my 'need holes' box as there was no way I was going to make a needle hole in fimo soft lentils - they'd be squished up (althought I suppose I could of employed the freezer again - must try that with some scrap ones). Once they emerge from the need holes box (waiting on my husband to either drill some holes or set me up to do it myself - he's the tools guy) they will make their way to my 'need sanding' box - one day they may emerge as some jewellery....